 2G Engine/Chassis Rewire/Tuck Guide
#370744
2G Engine/Chassis Rewire/Tuck Guide
#370744
March 08, 2012 07:43 pm UTC
March 08, 2012 07:43 pm UTC
|
Joined: Feb 2004
Posts: 2,642
Paradise, NL
Anthony Hiscock
 OP
OP
Insane Member
|
OP
Insane Member

Joined: Feb 2004
Posts: 2,642
Paradise, NL
|
This write up will cover many of the different aspects of how to rewire/tuck your engine/chassis harness and relocate your fuse box. I'm in the middle of mine so this won't be complete till mine is done but I will share what I've got up till now. I plan to show the tools I'm using, how to depin the various connectors, etc etc. This post will focus on the tools and materials you will need.First and foremost, DO NOT start this job without having Factory Service Manuals for your model year. The Electrical FSM covers so much information and is the most valuable thing to have when rewiring your car. If you need one, check out eBay. I bought mine from their for super cheap, used but in great condition. The second thing I HIGHLY recommend is a note book. For the dollar or less it will cost you it is more then worth it. Keep track of whatever you delete, add, where plugs are being moved to, etc etc. ![[Linked Image]](http://img.photobucket.com/albums/v87/G2Rac/96%20Talon%20TSI%20AWD/Wire%20Tuck/IMGP2621.jpg) Last thing I will talk about in this first post is tools. You will need several different ones and more depending on what you want to do. I'll add notes beside certain tools. ![[Linked Image]](http://img.photobucket.com/albums/v87/G2Rac/96%20Talon%20TSI%20AWD/Wire%20Tuck/IMGP2622.jpg) Nirtile gloves Nirtile gloves - removing the old loom and tape is messy and sticky, cover your hands. 10mm Socket - Needed to remove some of the OEM cables from the fuse box. Precision Screwdrivers (flat head) - You will need small ones for removing connector pin locks and depinning if you have one that will fit. 8mm Socket - Needed to remove some of the OEM cables from the fuse box. Wire Cutter of some sort - Either for cutting joins or cutting loom/electrical tape (I used scissors for this but forgot them in the picture). Sharpie - For Labeling plugs/connectors. Dental Picks - Great for depinning connectors. Masking Tape - For labeling connectors and holding the harness in shape. In the following picture, the items listed in red are only needed if you are adding Deutsch connectors and/or wrapping the harness with Braided Sleeving. ![[Linked Image]](http://img.photobucket.com/albums/v87/G2Rac/96%20Talon%20TSI%20AWD/Wire%20Tuck/IMGP2623.jpg) Braided Sleeve Braided Sleeve - various sizes, 1/8" to 1.5". Once I'm done I'll be able to comment on how much I used in my application. Hot Knife - To cut the braided sleeving. Masking Tape - to hold the harness shape while you route things. Deutsch HDT-48-00 Crimper - needed if you are using Deutsch connectors. Heat Shrink - To hold the braided sleeving in place.[/COLOR] Automatic Wire Strippers - perfect amount of wire stripped each and every time with no wire strands broken/nicked. Electrical Tape - I recommend good tape; Scotch/3M Supper 33+. ![[Linked Image]](http://img.photobucket.com/albums/v87/G2Rac/96%20Talon%20TSI%20AWD/Wire%20Tuck/IMGP2641.jpg) Soldering Iron Soldering Iron - A good quality one is what I recommend. This is some cheapie no name and will be replaced by a Weller or Hakko. Heat Gun - To shrink heat shrink. Adhesive Walled Heat Shrink - Not pictured. This is like regular heat shrink but has an adhesive inside. When heated it melts and makes a water/weather tight seal. That's it for this post. Stay tuned for the next one which will cover removing the harnesses from the car.
96 Talon TSI AWD - The Gold Digger/Never Ending Build
|
|
|
Re: 2G Engine/Chassis Rewire/Tuck Guide
[Re: Anthony Hiscock]
#370745
March 08, 2012 07:44 pm UTC
March 08, 2012 07:44 pm UTC
|
Joined: Feb 2004
Posts: 2,642
Paradise, NL
Anthony Hiscock
OP
Insane Member
|
OP
Insane Member
Joined: Feb 2004
Posts: 2,642
Paradise, NL
|
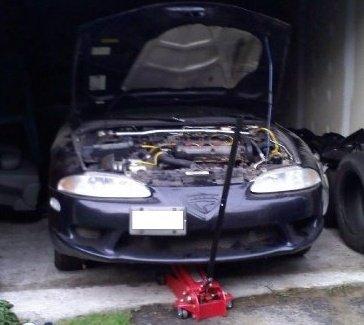
Part 2: Removing the Wiring Harnesses From The Car. First of all I apologize for my lack of pictures in this posts but I didn't take a ton when doing this so. This job is 1000x easier with the dash out of the car, here's a good write up: http://www.dsmtuners.com/forums/articles-exterior-interior/379111-2g-dash-removal-instructions.html Engine Harness Removal First thing you are going to do is go through and tag every single under hood connection. Get you masking tape, right what it is with the Sharpie and stick the label on. This post is a great help in getting it all labeled: http://www.dsmtuners.com/forums/art...g-engine-bay-electrical-connections.html![[Linked Image]](http://img.photobucket.com/albums/v87/G2Rac/96%20Talon%20TSI%20AWD/Wire%20Tuck/160_1623.jpg) ![[Linked Image]](http://img.photobucket.com/albums/v87/G2Rac/96%20Talon%20TSI%20AWD/Wire%20Tuck/160_1624.jpg) ![[Linked Image]](http://img.photobucket.com/albums/v87/G2Rac/96%20Talon%20TSI%20AWD/Wire%20Tuck/160_1625.jpg) After that is done you can unplug all the connectors and pull the harness from the firewall. To get the harness out of the wire wall you need to press in on each side of the plug at a time and move it forward, a flat head will help. Here's a close up of the plug (using one of the fender plug as an example): ![[Linked Image]](http://img.photobucket.com/albums/v87/G2Rac/96%20Talon%20TSI%20AWD/Wire%20Tuck/IMGP2620.jpg) After the plug is out it should all look something like this: ![[Linked Image]](http://img.photobucket.com/albums/v87/G2Rac/96%20Talon%20TSI%20AWD/Wire%20Tuck/102_1645.jpg) From here you can move inside and undo the ECU connections and the connectors that connect to the dash harness (these are on a metal bracket, I just unbolted the bracket as a whole). You can now pull the complete engine harness from the car. ![[Linked Image]](http://img.photobucket.com/albums/v87/G2Rac/96%20Talon%20TSI%20AWD/Wire%20Tuck/102_1646.jpg) Chassis Harness Removal Chassis Harness Removal I'd recommend putting the car on jack stands with the wheels off. I also pulled my rad but you don't need to it just made it easier. You will have to unbolt it though. You will need your bumper and headlights removed also. Start by unbolting your fuse box and fenders (remove the fender liners side skirt front cap needs to come off too, 4 bolts in the engine bay, a few in the wheel well IIRC and 2 under the car. The ones under the car may be rusted to hell). After that you can pull the fenders off or if you were unlucky like me with rusty bolts simply drop them down. ![[Linked Image]](http://img.photobucket.com/albums/v87/G2Rac/96%20Talon%20TSI%20AWD/IMGP2452.jpg) First go to the driver side and pull out the plug (exact same as the engine harness one); there is enough slack in the harness to pull it out and undo most the connectors. The few you can't undo you need to go in the car and remove them from the back of the interior fuse box. Next, head to the passenger side. You need to lift the carpet and you'll see a metal plate, 4 10mm nuts hold it down; remove them and then remove the plate. Under here is you ABS ECU and a multi-ground (there might be more but I can't remember); Undo the connectors. There's a connector on the side of the door jam (covered by the dash which is why it must be out) and the connector for the blower motor; undo these too. You can now pop out the harness plug and start working you way along unbolting any grounds and popping the harness out of the straps connecting it to the body. Repeat this for the driver side. After all that is done; you'll be rewarded with this. ![[Linked Image]](http://img.photobucket.com/albums/v87/G2Rac/96%20Talon%20TSI%20AWD/Wire%20Tuck/2011-09-18111201.jpg) ![[Linked Image]](http://img.photobucket.com/albums/v87/G2Rac/96%20Talon%20TSI%20AWD/Wire%20Tuck/2011-09-18111209.jpg)
96 Talon TSI AWD - The Gold Digger/Never Ending Build
|
|
|
Re: 2G Engine/Chassis Rewire/Tuck Guide
[Re: Anthony Hiscock]
#370746
March 08, 2012 07:44 pm UTC
March 08, 2012 07:44 pm UTC
|
Joined: Feb 2004
Posts: 2,642
Paradise, NL
Anthony Hiscock
OP
Insane Member
|
OP
Insane Member
Joined: Feb 2004
Posts: 2,642
Paradise, NL
|
Depinning Connectors Let's talk about depinning some of the various connectors found on the 2G DSM wiring harness. Depinning is 100% the correct way to do a wire tuck or rewire. This way if you decide you want to put something back in, it's simple! When you cut wires out it makes it much harder to add them back into the harness! Always work one connector at a time so you remember what wire goes where and make sure to label whatever you remove! Depinning is easily done with either dental picks or a small flat blade screw driver (precision screw driver, believe it or not this is what the FSM calls for when depinning!). There's 2 types of connectors, ones without a pin lock and ones with. Let's start by looking at a connector without a pin lock; the ISC connector in this case. ![[Linked Image]](http://img.photobucket.com/albums/v87/G2Rac/96%20Talon%20TSI%20AWD/Wire%20Tuck/IMGP2884.jpg) To remove the pin you lift up on the black pin retainer. ![[Linked Image]](http://img.photobucket.com/albums/v87/G2Rac/96%20Talon%20TSI%20AWD/Wire%20Tuck/IMGP2885.jpg) Pull on the wire from the back (you may need to stick the screwdriver into the pin and lift it up a bit so it will slide out). ![[Linked Image]](http://img.photobucket.com/albums/v87/G2Rac/96%20Talon%20TSI%20AWD/Wire%20Tuck/IMGP2886.jpg) Et Volia! Your connector is now depinned. ![[Linked Image]](http://img.photobucket.com/albums/v87/G2Rac/96%20Talon%20TSI%20AWD/Wire%20Tuck/IMGP2887.jpg) Here's the connector with a pin lock, the green piece around it. You need to remove this before you can depin the connector. ![[Linked Image]](http://img.photobucket.com/albums/v87/G2Rac/96%20Talon%20TSI%20AWD/Wire%20Tuck/IMGP2888.jpg) Simply stick the flat head between the lock and the connector housing and pry it up, then take it out and set it aside. ![[Linked Image]](http://img.photobucket.com/albums/v87/G2Rac/96%20Talon%20TSI%20AWD/Wire%20Tuck/IMGP2890.jpg) ![[Linked Image]](http://img.photobucket.com/albums/v87/G2Rac/96%20Talon%20TSI%20AWD/Wire%20Tuck/IMGP2891.jpg) The rest of the depin is just like before, lift the pin retainer and pull the wire out. ![[Linked Image]](http://img.photobucket.com/albums/v87/G2Rac/96%20Talon%20TSI%20AWD/Wire%20Tuck/IMGP2892.jpg) ![[Linked Image]](http://img.photobucket.com/albums/v87/G2Rac/96%20Talon%20TSI%20AWD/Wire%20Tuck/IMGP2893.jpg) Since everyone LOVES videos, here's one! http://www.youtube.com/watch?v=jxpee336O8o&feature=youtu.be
96 Talon TSI AWD - The Gold Digger/Never Ending Build
|
|
|
Re: 2G Engine/Chassis Rewire/Tuck Guide
[Re: Anthony Hiscock]
#383173
September 06, 2012 04:58 pm UTC
September 06, 2012 04:58 pm UTC
|
Joined: May 2010
Posts: 1,106
Saskatoon, Saskatchewan
Andrew Trapp
Serious Member
|
Serious Member
Joined: May 2010
Posts: 1,106
Saskatoon, Saskatchewan
|
Finally got the time to add my tidbit on doing this job. When moving the fusebox, you will find you may need to adjust distances of wire or you may even want to completely rerun stuff. What I did was completely dismantle the harness and start essentially from scratch. Here is what I did: ![[Linked Image]](https://lh5.googleusercontent.com/-dGb4i036ZBg/T16MHiio61I/AAAAAAAAAN0/f_fN_ftqXy4/s800/2012-02-26%252011.39.21.jpg) ![[Linked Image]](https://lh6.googleusercontent.com/-PGo-IRCB8s0/T16Mh_icViI/AAAAAAAAAOM/8Qxtc25clBo/s800/2012-02-26%252011.39.35.jpg) I decided to relocate my fusebox to the center console. I also decided that it was really silly to run the wire across the front with the new location. The route I decided on was all the wires run to the firewall, then split off towards each side of the car. The passenger side would further split to go through the inside grommet to the battery/alternator, and out the passenger grommet to the right headlight. The first thing I did was remove all the ground wire splices. When examining the harness, you had somethings that were grounded on the other side of the engine bay, even though there was a ground point close to the location. Since nothing is timing based (like digital circuits) the length of the ground doesn't need to be equal length, nor is much consequence. Needless to say, I was able to eliminate a good chunk of grounding wire just by choosing better ground points. Cutting the grounding splices will also make the entire harness just so much easier to work with (untangling, running straight, etc...). The second thing was to relocate the lighting wire splices. The headlights are connected through each other at the front of the car, my new route would no longer use this so I made the split at the firewall where the two headlights parted ways. The third step was using pieces of string to locate distances. I ran three strings for each path. Fusebox to driver headlight, fusebox to passenger headlight, and fusebox to battery/alt. I taped and marked out on the strings where everything was so. I then laid out the string on the floor and started extending and trimming wires as needed. The grounds I extended to each headlight on the respective sides, to be roughly in the position they needed to be. Once the harness was put into place, I finished up the grounds. finished product: ![[Linked Image]](https://lh4.googleusercontent.com/-nXj8M0M7X1E/T16LwIRxKmI/AAAAAAAAANs/ZbE0spMnoZI/s800/2012-03-11%252015.09.06.jpg) You can roughly see where the firewall split is and the small take off of where the the harness goes to the battery.
Last edited by Andrew Trapp; September 06, 2012 04:59 pm UTC.
|
|
|
Re: 2G Engine/Chassis Rewire/Tuck Guide
[Re: Anthony Hiscock]
#383213
September 07, 2012 01:11 am UTC
September 07, 2012 01:11 am UTC
|
Joined: May 2010
Posts: 1,106
Saskatoon, Saskatchewan
Andrew Trapp
Serious Member
|
Serious Member
Joined: May 2010
Posts: 1,106
Saskatoon, Saskatchewan
|
As much as I hated doing it, it cleans the bay up so much! And as much as I hate to say it, I think it is better than stock  Kept the same gauge wire for quite a few things and was able to actually shorten the lengths - headlights primarily. Additionally, if you add any power consuming things under the hood, you can plan it into the harness. I know that I'm going to an external oil cooler with a fan, so I ran a +12v wire and ground for the fan through the fusebox, so I now also have a neat and tidy fuse for it
|
|
|
Re: 2G Engine/Chassis Rewire/Tuck Guide
[Re: Michael Lee]
#383234
September 07, 2012 03:09 am UTC
September 07, 2012 03:09 am UTC
|
Joined: Sep 2010
Posts: 2,831
Moose Jaw SK / Cambridge ON
Johnny Larmond
Insane Member
|
Insane Member
Joined: Sep 2010
Posts: 2,831
Moose Jaw SK / Cambridge ON
|
BlurredTalon is Anthony Hiscock from here. Edit: who started this thread. LMFAO!!!!! WOW. Now that I look again, all of the pictures are the same. Maybe I should lay off the sauce for a while. hahahaha Does that make you shampooo? I love the meth lines on that one Jason. So clean.
Last edited by Johnny Larmond; September 07, 2012 03:12 am UTC.
'97 GSX - DD and running strong
'99 GSX Spyder - Running strong
'99 GS - zzzz.
PHP: 4
|
|
|
Re: 2G Engine/Chassis Rewire/Tuck Guide
[Re: Anthony Hiscock]
#383240
September 07, 2012 03:20 am UTC
September 07, 2012 03:20 am UTC
|
Joined: Nov 2009
Posts: 2,940
Toronto, Ontario, Canada
Michael Lee
Insane Member
|
Insane Member
Joined: Nov 2009
Posts: 2,940
Toronto, Ontario, Canada
|
Bah haha, yes that is I.
Guess who Guillame is? Lurker
Last edited by Michael Lee; September 07, 2012 03:20 am UTC.
1997 Eclipse GST/X
Eat in small amounts. Otherwise be prepared to paint toilet bowls~ Mike Eng
|
|
|
Re: 2G Engine/Chassis Rewire/Tuck Guide
[Re: Anthony Hiscock]
#383265
September 07, 2012 12:02 pm UTC
September 07, 2012 12:02 pm UTC
|
Joined: Oct 2010
Posts: 9,968
Caledon, Ontario, Canada
Bryan Lawrence
Senior Member, with Far TOO Much Time on Their Hands
|
Senior Member, with Far TOO Much Time on Their Hands
Joined: Oct 2010
Posts: 9,968
Caledon, Ontario, Canada
|
HAHA! Yeah, see if you can find me Michael 
"Old Blue" 91 Talon TSi AWD
"Super Enthusiast" 91 Talon TSi AWD
Checkout DSMFAQ.com!
|
|
|
Re: 2G Engine/Chassis Rewire/Tuck Guide
[Re: Anthony Hiscock]
#383289
September 07, 2012 03:21 pm UTC
September 07, 2012 03:21 pm UTC
|
Joined: Oct 2010
Posts: 9,968
Caledon, Ontario, Canada
Bryan Lawrence
Senior Member, with Far TOO Much Time on Their Hands
|
Senior Member, with Far TOO Much Time on Their Hands
Joined: Oct 2010
Posts: 9,968
Caledon, Ontario, Canada
|
I haven't changed my picture since I got the car, so it's one of the pictures that the seller took.
"Old Blue" 91 Talon TSi AWD
"Super Enthusiast" 91 Talon TSi AWD
Checkout DSMFAQ.com!
|
|
|
Re: 2G Engine/Chassis Rewire/Tuck Guide
[Re: Anthony Hiscock]
#384898
September 26, 2012 01:53 am UTC
September 26, 2012 01:53 am UTC
|
Joined: May 2007
Posts: 707
ON
Bradley Woodward
Serious Member
|
Serious Member
Joined: May 2007
Posts: 707
ON
|
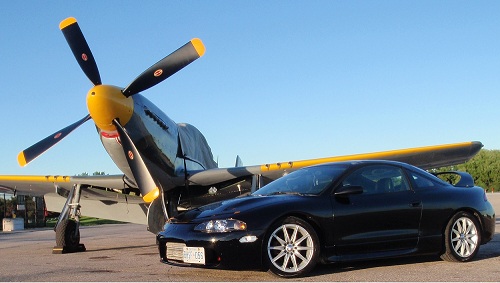
race cars are covered in oil, so that is a show car, and that is lame.
BOOST...Boo-Yah
|
|
|
Re: 2G Engine/Chassis Rewire/Tuck Guide
[Re: Jason Drew]
#385278
September 30, 2012 03:49 am UTC
September 30, 2012 03:49 am UTC
|
Joined: Feb 2004
Posts: 2,642
Paradise, NL
Anthony Hiscock
OP
Insane Member
|
OP
Insane Member
Joined: Feb 2004
Posts: 2,642
Paradise, NL
|
Finally got the time to add my tidbit on doing this job. When moving the fusebox, you will find you may need to adjust distances of wire or you may even want to completely rerun stuff. What I did was completely dismantle the harness and start essentially from scratch. Here is what I did: I decided to relocate my fusebox to the center console. I also decided that it was really silly to run the wire across the front with the new location. The route I decided on was all the wires run to the firewall, then split off towards each side of the car. The passenger side would further split to go through the inside grommet to the battery/alternator, and out the passenger grommet to the right headlight. The first thing I did was remove all the ground wire splices. When examining the harness, you had somethings that were grounded on the other side of the engine bay, even though there was a ground point close to the location. Since nothing is timing based (like digital circuits) the length of the ground doesn't need to be equal length, nor is much consequence. Needless to say, I was able to eliminate a good chunk of grounding wire just by choosing better ground points. Cutting the grounding splices will also make the entire harness just so much easier to work with (untangling, running straight, etc...). The second thing was to relocate the lighting wire splices. The headlights are connected through each other at the front of the car, my new route would no longer use this so I made the split at the firewall where the two headlights parted ways. The third step was using pieces of string to locate distances. I ran three strings for each path. Fusebox to driver headlight, fusebox to passenger headlight, and fusebox to battery/alt. I taped and marked out on the strings where everything was so. I then laid out the string on the floor and started extending and trimming wires as needed. The grounds I extended to each headlight on the respective sides, to be roughly in the position they needed to be. Once the harness was put into place, I finished up the grounds. finished product: You can roughly see where the firewall split is and the small take off of where the the harness goes to the battery. Nice work Andrew. *bows head*
Amazing write up. Thanks so much. Thank you sir. I like sharing with fellow DSMers. Good info, I'm really considering doing this to go along with my built 6 bolt, might as well go all the way with it.
10 sec show car status? Yes please! No reason you can't go fast AND look good. As much as I hated doing it, it cleans the bay up so much! And as much as I hate to say it, I think it is better than stock Kept the same gauge wire for quite a few things and was able to actually shorten the lengths - headlights primarily. Additionally, if you add any power consuming things under the hood, you can plan it into the harness. I know that I'm going to an external oil cooler with a fan, so I ran a +12v wire and ground for the fan through the fusebox, so I now also have a neat and tidy fuse for it It's great because you can route things how you want, make some additions, etc. All my aftermarket stuff is powered by my OEM relays and fuses with exception of my fuel pump rewire. this is far too tedious for me but amazing work anthony! Thanks, I like tedious though. BlurredTalon is Anthony Hiscock from here. Edit: who started this thread. Yup, I am Blurred Talon. I keep this pic on my desktop as motivation for my bay. ![[Linked Image]](http://i689.photobucket.com/albums/vv259/jdxnc/417568_335918579823964_996816184_n-1.jpg) Tim Zimmer's bay? race cars are covered in oil, so that is a show car, and that is lame. Says who? What's wrong with having your car clean and fast? Have you seen the wiring in a real race car? A properly maintained race car shouldn't be leaking any oil. Bang on! Wow that's a lot of quotes!! Thanks for the kind words guys. I'm offically diving back into my harness next weekend and hope to knock out 95% of it, short of having the car powered because I still need to figure out my distrubtion block. My harness is certainly a little more complex then others. Mil-spec cannon plug on the fire wall for ease of disconnect, a Duestch plug for the fuel injectors, another Duestch plug in each fender well to make the harness completely modular. I honestly can't wait to finish it!
96 Talon TSI AWD - The Gold Digger/Never Ending Build
|
|
|
|
|


![[Linked Image]](http://img.photobucket.com/albums/v87/G2Rac/96%20Talon%20TSI%20AWD/Wire%20Tuck/100_0188.jpg)
![[Linked Image]](http://img.photobucket.com/albums/v87/G2Rac/96%20Talon%20TSI%20AWD/Wire%20Tuck/100_0215.jpg)
![[Linked Image]](http://img.photobucket.com/albums/v87/G2Rac/96%20Talon%20TSI%20AWD/Wire%20Tuck/100_0216.jpg)