1Ga HID Headlight Installation Guide
#410342
1Ga HID Headlight Installation Guide
#410342
August 07, 2013 04:21 am UTC
August 07, 2013 04:21 am UTC
|
Joined: Nov 2001
Posts: 2,300
Aylmer, Quebec
Gates Perry
 OP
OP
Insane Member
|
OP
Insane Member

Joined: Nov 2001
Posts: 2,300
Aylmer, Quebec
|
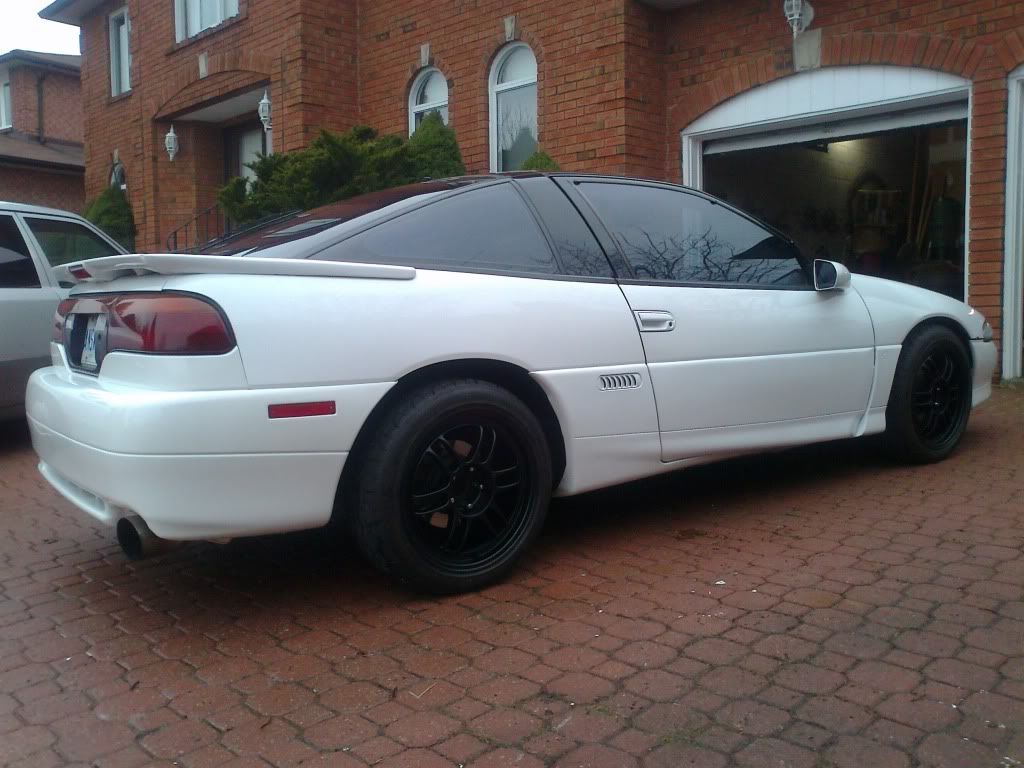
I whipped this together for anyone looking to install this aftermarket HID dual-beam headlamp kit off of eBay discussed in this thread. Useful for 1Ga owners who have something similar to this going on in the front of their car: ![[Linked Image]](http://i40.tinypic.com/9ld551.jpg) As you certainly know if you own a 1Ga with stock headlights, they don't provide much light on those cold, dark nights out in the boonies. Uber sadface. As you certainly know if you own a 1Ga with stock headlights, they don't provide much light on those cold, dark nights out in the boonies. Uber sadface.First off, the disclaimer. Attempt at your own risk. Always be safe and DO read the installation instructions provided both online by the vendor and within your new HID kit's package. I won't be liable for anything that goes wrong during your installation. Your individual results may vary. Lastly, remember that you're working on a DSM and patience is better than brute force most of the time!Don't be too scared to try this on your own. This will sound way harder than it actually is because I wrote it out for those you who might not be very experienced with doing things yourself in such a way that (hopefully) complete laymen and laywomen (which sounds wildly inappropriate and as though it could potentially lead to a harassment suit) should be able to follow along. Familiarize yourself with the instructions that came with your new HID kit as well as those provided online by the vendor because they’ll go over several safety precautions which I won’t bother relisting here and they'll also give you visuals on what to expect in case you find my photos are lackluster. Now then, onto the good stuff! TOOLS REQUIRED- Phillips (star) screwdriver
- Precision-sized slotted (flathead) screwdriver
- Tin snips
- Plier snips
- Pliers
INSTALLATIONStep 1: Remove the headlamp housing assemblies when your pop-ups are in the "up" positionA. Using your Phillips screwdriver, remove the screws fastening the top and bottom pop-up bezels. Be careful when removing the bottom bezels; it is easiest to angle them inward to clear the headlamp assemblies when pulling them out. ![[Linked Image]](http://i40.tinypic.com/xkozll.jpg) Screws are located at each arrow; two on each side of the top bezels.B. Screws are located at each arrow; two on each side of the top bezels.B. Remove the adjustment screws from your headlamps using the Phillips screwdriver. These are located on the top and inner side of each headlamp housing assembly. ![[Linked Image]](http://i39.tinypic.com/24mgqjk.jpg) Adjustment screws are located at each arrow. Adjustment screws are located at each arrow.![[Linked Image]](http://i41.tinypic.com/4pv51x.jpg) Side view of the adjustment screw. They're long! C. Side view of the adjustment screw. They're long! C. Disconnect the tensioner spring from the bottom of the headlamp assemblies. D. Be sure to disconnect the factory connectors from your sealed beam headlamps prior to yanking out the headlamp assemblies! ![[Linked Image]](http://i41.tinypic.com/2wfoa5j.jpg) The tensioner spring located is behind the dangling headlamp in this photo. So is the factory harness.Step 2: Removing your sealed beam headlamps from the housing assembliesA. The tensioner spring located is behind the dangling headlamp in this photo. So is the factory harness.Step 2: Removing your sealed beam headlamps from the housing assembliesA. Use the Phillips screwdriver to remove the four screws fastening the retainer rings from the front of the headlamp assemblies. These might be quite rusty so the use of Liquid Wrench or similar products is highly recommended. You can still manage to get the swap done if only 2 of the 4 screws are removed so long as you have both screws from the same side removed (top or bottom ones). Note that doing so might break your retainer ring and will otherwise be a huge pain in the ass to get everything back in afterwards, so try your best to avoid this. Once the screws are removed, take off the retainer rings. B. Remove your sealed beam headlamps from the headlamp assemblies. You might need to coax the headlamps out. C. Put your housing assemblies aside for modification (described under step 4). D. Find another use for your sealed beam headlamps. Ideas that come to mind are ugly paperweights and doorstoppers. Alternatively, dispose of them in the proper manner (you may want to do that only once you've confirmed that the new stuff works). Step 3: Preparing your new HID kit headlamps for installationA. Your new HID headlamps come with round rubber grommets in the middle of the pack of wires. I removed this grommet during my installation because I don’t believe a water-tight seal is possible if it is kept intact. The grommet can be removed by using plier snips to cut the grommet into 4 sections (like a pie... mmm pie...). Then, bring your plier snips as close to the wire as possible and trim the grommet to the point where there’s little or no grommet left near that side of the wire and it should be safe to separate the two. Be careful when doing this step or you might accidentally snip your new HID kit’s wiring! Sorry, I forgot to snap photos of this grommet and the associated step. You'll know exactly what I'm talking about when you get your new HID kit or if you take a look at the images of the new HID kit itself when following the eBay link in my first sentence above.B. Your new HID kit may also come with a blue LED light within the headlamps themselves like mine did. I didn't want them so I yanked out the small grommets (bulbs included), removed the bulbs from those grommets and then tore the wires out as well. I noticed that the grommets had long tips that poked out from the new HID kit's headlamps, which would have been problematic during reinstallation due to clearance issues, so I cut those short with my plier snips. I then placed the trimmed grommets back into the new HID kit headlamps. I wanted these to be waterproof, so I made sure to seal the small holes in the grommets with ultra-adhesive waterproof material that I had kicking around the garage. ![[Linked Image]](http://i40.tinypic.com/f07049.jpg) One of the unwanted blue bulbs used to be in the grommet identified in this photo. The other bulb is in the other headlamp.C. One of the unwanted blue bulbs used to be in the grommet identified in this photo. The other bulb is in the other headlamp.C. Gently insert your precision-sized slotted screwdriver into each of the H4 harnesses’ pin-outs from your new HID kit's wiring in order to remove the connectors themselves from the harness. This doesn't take much force at all. You can actually see the tiny area where you’ll need to apply pressure in order to remove these when you’re looking into the new HID kit’s harnesses. I did this rather than hack up my stock harness. D. Remove the round rear rubber grommets from your new HID kit’s headlamps. E. Remove the bulbs that came in your new HIT kit’s headlamps and replace them with the HID bulbs that also came with your new kit. The bulbs you want to end up using are the ones that came with a clear plastic tube with warning signs surrounding them. The undesired bulb can be removed by pushing the pressure-fitted clamp which rests on the bulb downward, sideways and then lifting it out of the way. DO NOT touch the new bulbs that came in the tubes with your bare hands (or the old ones if you plan on using them elsewhere for that matter). Avoid getting grease/oil/dirt on the bulbs at all costs. If you have no choice but to touch them bare-handed, wash the new bulbs with alcohol (as described in the instruction manual that came with your new HID kit) and be sure to remove all residue from the new bulb. F. Put the previously tube-sealed HID bulbs into your new HID kit’s headlamps (installation is reverse from removal in step E above). Note that they can only fit one way so you can't go wrong as long as you don't pull a Homer Simpson while exclaiming "fit, damn you, FIT"! G. Replace the round rear rubber grommets on the back of your new HID kit’s headlamps. You'll need to feed all wiring through the small holes in the center of the grommets in order to get this done. I started with feeding the largest plug through and worked my way down to getting the smallest ones through. A good tip would be to invert the direction that the round rear rubber grommet's inner hole faces when stuffing these through and, once done, revert the direction of said hole back to the way that it was originally. Be patient in pushing these grommets back down so that you can get it as water-tight as you can. I used my precision-sized slotted screwdriver to assist with this step and carefully pushed sections into the appropriate areas. Step 4: Modifying your stock headlamp housing assemblies to fit your new HID kit’s headlamps![[Linked Image]](http://i39.tinypic.com/33ugac9.jpg) This is what your stock headlamp assembly's rear end looks like. Oh myyy!A. This is what your stock headlamp assembly's rear end looks like. Oh myyy!A. Use your tin snips to cut perpendicular lines along the inner headlamp assemblies' center holes. This is best done in half to 1 centimetre intervals. ![[Linked Image]](http://i44.tinypic.com/vy8qit.jpg) To give you an idea of the size/depth of the cuts you need to make with your snips.B. To give you an idea of the size/depth of the cuts you need to make with your snips.B. When the housing assemblies are face down on your work bench, use your pliers to bend the metal tabs that you've just made outward from the central circular hole. Bear in mind that this is being done so that you can use the round rear rubber grommets that cover the bulbs on the back of your new HID kit’s headlamps and the goal is to make it a snug fit. Be careful when completing this step. Sharp metal is sharp! You may need to test fit the back of your new HID kit’s headlamps a few times before getting it just right. Note: I used this method for a few reasons: it was quick, easy and didn't require power tools which I didn't have lying around. I initially tried a dremel and got really pissed off when the bit flew off and, like an idiot, I grabbed it with my bare hands and singed my digits! Plus, I'm the only one who'll ever go back and work in there so I'll be aware of the sharp edges. You may wish to do this by another means if you're looking for a cleaner/safer installation.![[Linked Image]](http://i44.tinypic.com/2m484r4.jpg) ![[Linked Image]](http://i43.tinypic.com/20ztyth.jpg) These two images depict how much clearance the round rear rubber grommets will require.Continued in next post... These two images depict how much clearance the round rear rubber grommets will require.Continued in next post...
1990 TSi AWD - Got Boost?  1992 TSi AWD - R.I.P
|
|
|
1Ga HID Headlight Installation Guide
[Re: Gates Perry]
#410343
August 07, 2013 04:23 am UTC
August 07, 2013 04:23 am UTC
|
Joined: Nov 2001
Posts: 2,300
Aylmer, Quebec
Gates Perry
OP
Insane Member
|
OP
Insane Member
Joined: Nov 2001
Posts: 2,300
Aylmer, Quebec
|
Step 5: Installing your new HID kit’s headlamps into your modified housing assembliesA. Place your retainer rings face down on your work bench. You may also want to put something down to prevent damaging the front of your new HID kit’s headlamps. B. Slide your new HID kit’s headlamps into the reatiner rings. Note that you’ll have to try and bring down all four corners of the retainer rings at the same time or you might find this task extremely difficult. Also note that you may hear the sound of glass breaking. Don’t freak out! This is from friction between the outer proximity of your new HID kit’s headlamps and the retainer rings themselves. This happened to both Jason and me during our installations. We considered this "normal" as the retainer rings are a really tight fit over the new HID kit’s headlamps. Do be extremely careful because you wouldn't want to actually crack/break your new HID kit’s headlamps. You'll know that you're good to go when the retainer ring sits flush with your new headlamps. So long as you don’t Incredible Hulk it, you should be fine. C. Install your modified housing assemblies over the back of the round read rubber grommets. Be sure to fish your wires through properly and don’t pinch them! D. Use your Phillips screwdriver to fasten the screws back onto the retainer rings and into your modified housing assemblies. Step 6: Installing the new HID kit’s headlamps and your modified housing assemblies into your carA. You'll notice a very small, vented plastic weather guard when looking under each of your pop-ups. For the quickest installation, these can be removed in order to allow a space for all of the new HID kit’s wiring to run through unobstructed. Alternatively, you will have to determine how to do so without removing it on your own! I removed the vented weather guard because I rarely drive my car in bad weather. However, if you drive often in rainy/snowy/wet conditions, I recommend routing the wires elsewhere. ![[Linked Image]](http://i42.tinypic.com/b5s6zo.jpg) This is the plastic piece I'm talking about. This is the plastic piece I'm talking about.![[Linked Image]](http://i39.tinypic.com/2i0c19h.jpg) This is the hole that remains once that piece is removed (facing the pop-ups from the cabin side).B. This is the hole that remains once that piece is removed (facing the pop-ups from the cabin side).B. The connectors that were removed from your new HID kit's H4 harnesses can now be plugged into the appropriate slots in your stock harnesses. Mine was configured in this fashion (much as described in the eBay link's "installation instructions"): (Stock headlight connector) to new HID kit’s wires- (angled=ground) to double black wires
- (horizontal=high) to red wire
- (vertical=low)to thin black wire
![[Linked Image]](http://i42.tinypic.com/21eafrc.jpg) Connectors plugged into unmolested factory harness.The remaining HID kit’s wires connect to the HID kit’s ballasts in this manner Connectors plugged into unmolested factory harness.The remaining HID kit’s wires connect to the HID kit’s ballasts in this manner- (large to small)
- (small to large)
- (medium to medium)
It's important to note that I had to flip the medium connector to get my HID lights working. The halogen secondary beams worked fine but I ended up having to connect the + to the - instead of the + to the + (this is known as a reverse polairty issue common with our DSMs). Easy fix: flip the medium connector so that the clip side is opposing the fastener on the other side!![[Linked Image]](http://i43.tinypic.com/w2cak8.jpg) Notice that the medium connector's clip is not on the same side as the latch - this solves the reverse polarity issue.C. Notice that the medium connector's clip is not on the same side as the latch - this solves the reverse polarity issue.C. TEST time! Reconnect your battery (if you disconnected it like the installation guide that came with the kit tells you to…) and turn on your lights. Try your high and low beams. Both should work. If not, read directly above this step - reverse polarity is the biggest problem that people with our cars run into when installing this new HID kit. Otherwise, use your Google-Fu, grasshopper! D.You may want to insulate your connections against the elements. I sure did! E. Find a nice place to mount your new HID kit’s ballasts. You can either use the 3M adhesive tape provided in your new HID kit, some screws, or whatever else floats your boat. Ensure that there's an ample amount of slack in your wires so as to allow the pop-ups to go up and down without stressing/breaking any of the wiring. F. Reinstall your new HID kit headlamps and your modified housing assemblies into your car by starting with reconnecting the tensioner springs. G. Reinstall the adjustment screws. H. Pop open a cold one and wait until dark! You're going to have adjust your headlights properly. If you don't know how to do this, try reading this tutorial. I recommend doing this properly the first time because it's the biggest cause of annoyance to other drivers and lack of proper visibility at night. I. Reinstall the top and bottom pop-up bezels. ENJOY YOUR NEW HEADLIGHTS!![[Linked Image]](http://i41.tinypic.com/1zxm64w.jpg) Can you see the difference?Step 1: Drive at nightA. Can you see the difference?Step 1: Drive at nightA. Turn on your new HID headlights. B. Notice that you find yourself forgetting to look forward to the next street lamp’s soft glow! C. Profit??? This installation guide was brought to you by the letters G and P and the number 69 (get your mind out of the gutter, I'm a Cancer).
1990 TSi AWD - Got Boost? 1992 TSi AWD - R.I.P
|
|
|
 Re: 1Ga HID Headlight Installation Guide
[Re: Gates Perry]
#410352
Re: 1Ga HID Headlight Installation Guide
[Re: Gates Perry]
#410352
August 07, 2013 11:18 am UTC
August 07, 2013 11:18 am UTC
|
Joined: Oct 2010
Posts: 9,968
Caledon, Ontario, Canada
Bryan Lawrence
Senior Member, with Far TOO Much Time on Their Hands
|
Senior Member, with Far TOO Much Time on Their Hands
Joined: Oct 2010
Posts: 9,968
Caledon, Ontario, Canada
|
I am glad you posted this, now know that I won't be attempting this unforunately. My adjustment screws seem to work but I can't remove them totally.
Also nice to see that they just use universal way of connecting it to the switch and that it's not set to H4.
Very nice guide, very well laid out!
We will have to compare output after I do a relay setup and put my rally bulbs in.
"Old Blue" 91 Talon TSi AWD
"Super Enthusiast" 91 Talon TSi AWD
Checkout DSMFAQ.com!
|
|
|
Re: 1Ga HID Headlight Installation Guide
[Re: Gates Perry]
#410370
August 07, 2013 02:13 pm UTC
August 07, 2013 02:13 pm UTC
|
Joined: Nov 2001
Posts: 2,300
Aylmer, Quebec
Gates Perry
OP
Insane Member
|
OP
Insane Member
Joined: Nov 2001
Posts: 2,300
Aylmer, Quebec
|
Look at the ebay ad and the general setup, I am highly suspect these will work well without blinding oncoming drivers, even if they say it's been designed for a halogen reflector housing.
Your best bet would be to black out the reflective backing and use proper projectors. Your point is well taken, Salomon. I was skeptical until I had these installed and tried them out at night. A buddy borrowed my car so I could see how the light affected my eyes as I drove toward it. I was pleasantly surprised that neither the HID bulbs nor the halogen bulbs were very hard on my eyes, though I did find the HID bulbs brighter than the halogen bulbs. I think proper adjustment really helped because prior to turning the adjustment screws it was REALLY out of whack. As for blacking out the reflective backing, I wasn't about to crack open my brand new headlamps without trying them out first in case they were toast. That's a good idea for a mod for a future date, though! 
1990 TSi AWD - Got Boost? 1992 TSi AWD - R.I.P
|
|
|
Re: 1Ga HID Headlight Installation Guide
[Re: Gates Perry]
#410379
August 07, 2013 03:08 pm UTC
August 07, 2013 03:08 pm UTC
|
Joined: Nov 2001
Posts: 2,300
Aylmer, Quebec
Gates Perry
OP
Insane Member
|
OP
Insane Member
Joined: Nov 2001
Posts: 2,300
Aylmer, Quebec
|
Salomon, after using that 3M headlight restoration kit, you might want to consider taking a peek in this thread by Jeremy Chin. He goes over several plug-and-play type bulbs that work better than stock. His current setup, identified at the bottom of his first post, is identical to what I had in my 1Gb way back in the day and I found the lighting output from those Sylvanias way better than stock - even with Simpson-yellow lenses! 
1990 TSi AWD - Got Boost? 1992 TSi AWD - R.I.P
|
|
|
Re: 1Ga HID Headlight Installation Guide
[Re: Gates Perry]
#410380
August 07, 2013 03:18 pm UTC
August 07, 2013 03:18 pm UTC
|
Joined: Apr 2010
Posts: 6,809
Ottawa, ON
Mike Eng
Senior Member, with Far TOO Much Time on Their Hands
|
Senior Member, with Far TOO Much Time on Their Hands
Joined: Apr 2010
Posts: 6,809
Ottawa, ON
|
2500 grit is like paper. Worthless start at 1500 and 2000..wet sanding of course. Then a high speed buff with some compound. Should shine them up REALLY nicely! Awesome work Gates.. I have to ask though, is Gates your first or last name? Either way, bravo on some good craftmanship!
'99 GSX GT35R
'03 CBR 600RR
|
|
|
Re: 1Ga HID Headlight Installation Guide
[Re: Gates Perry]
#410383
August 07, 2013 03:24 pm UTC
August 07, 2013 03:24 pm UTC
|
Joined: Nov 2001
Posts: 2,300
Aylmer, Quebec
Gates Perry
OP
Insane Member
|
OP
Insane Member
Joined: Nov 2001
Posts: 2,300
Aylmer, Quebec
|
Haha Mike - fair question. My first name is Gates. I've never met anyone who shares it. The only person who comes close is "Gates McFadden", AKA Dr. Beverly Crusher from Star Trek: The Next Generation, however Gates is her middle name. According to her Wikipedia page, she is usually credited as "Gates McFadden" as an actress and "Cheryl McFadden" as a choreographer. Also, thanks for the props, Mike! I'm now noticing you're from Ottawa. Surprised I haven't seen you around before... or maybe I have - how long have you had your DSM? 
1990 TSi AWD - Got Boost? 1992 TSi AWD - R.I.P
|
|
|
Re: 1Ga HID Headlight Installation Guide
[Re: Gates Perry]
#410386
August 07, 2013 03:31 pm UTC
August 07, 2013 03:31 pm UTC
|
Joined: Apr 2010
Posts: 6,809
Ottawa, ON
Mike Eng
Senior Member, with Far TOO Much Time on Their Hands
|
Senior Member, with Far TOO Much Time on Their Hands
Joined: Apr 2010
Posts: 6,809
Ottawa, ON
|
Haha Mike - fair question. My first name is Gates. I've never met anyone who shares it. The only person who comes close is "Gates McFadden", AKA Dr. Beverly Crusher from Star Trek: The Next Generation, however Gates is her middle name. According to her Wikipedia page, she is usually credited as "Gates McFadden" as an actress and "Cheryl McFadden" as a choreographer. Also, thanks for the props, Mike! I'm now noticing you're from Ottawa. Surprised I haven't seen you around before... or maybe I have - how long have you had your DSM? I've owned it since 2009. Been a life dream of mine to own this car...I should specify, a REALISTIC life dream We'll have to meet one of these days.
'99 GSX GT35R
'03 CBR 600RR
|
|
|
|
|