|
 AE86 build update
#322153
AE86 build update
#322153
January 19, 2010 09:49 pm UTC
January 19, 2010 09:49 pm UTC
|
Joined: Nov 2007
Posts: 253
St. John's, NL
Mike Hiscott
 OP
OP
Serious Member
|
OP
Serious Member
Joined: Nov 2007
Posts: 253
St. John's, NL
|
So for the past while I've been living 350km away from the car, hence why the progress is really slow, but I'm taking Thursday and Friday off this week and putting 4 hard days into it. Sadly I'll only get until Sunday around noon, but I'll try to get the most done I can. I'll also try to make frequent updates over the weekend with pics pics pics. Anyhow, I've done a bit of work with the car in the mean time so here's the starting point for me this weekend: Gauge cluster I bought from the previous owner: ![[Linked Image]](http://i48.tinypic.com/vq7gn6.jpg) ![[Linked Image]](http://i48.tinypic.com/wjjcl3.jpg) Here's a shot right after the bay was painted and I had the electrical harness reinstalled: ![[Linked Image]](http://i48.tinypic.com/345o7r4.jpg) I installed the sideskirts properly. When I bought the car, they were held on with huge amounts of urethane. I removed all the urethane with a blade tediously (took forever)... Eventually I had it all cleaned up and removed the clip mounts that involved drilling out a few screws in the skirt back bracing.... The car shell was originally an SR5, so there was only one skirt mounting hole in the rocker panel. I lined everything up and installed them the way they would have been done from the factory. I used stainless nuts as standoffs from the body. ![[Linked Image]](http://i47.tinypic.com/30rpppw.jpg) ![[Linked Image]](http://i46.tinypic.com/wmm1c1.jpg) I blasted the pedals then etch primered them (this shot) followed by gloss black. ![[Linked Image]](http://i48.tinypic.com/25uqn0l.jpg) Here they are installed. Notice how I added the upper mount for the clutch pedal. The previous owner didn't have this mounting point added (the car was auto from the factory), so there was a bit of flex in the pedal with a heavy clutch... I drilled out the spot welds holding the mount from a GTS manual trans car, and welded it on. ![[Linked Image]](http://i45.tinypic.com/33z8gzo.jpg) Various suspension peices after blasting: ![[Linked Image]](http://i49.tinypic.com/t0kaba.jpg) AW11 MR2 manual rack installed: ![[Linked Image]](http://i50.tinypic.com/155t0rc.jpg) I now have the supra intermediate shaft and tercel u-joint needed to hook the AE86 power steering column to the mk2 rack. Pics of that later  Gotta mock up the intercooler piping soon...ugh ![[Linked Image]](http://i45.tinypic.com/avol1k.jpg) This is after the brake lines were all done and the Wilwood master was back in. [img] http://i47.tinypic.com/e7ku86.jpg[/img] [img] http://i45.tinypic.com/rbeeqe.jpg[/img] Oh yes! [img] http://i46.tinypic.com/k1747p.jpg[/img] New welding setup! [img] http://i45.tinypic.com/2hhjgqr.jpg[/img] Stay tuned!
|
|
|
Re: AE86 build update
[Re: Jay McClelland]
#322261
January 21, 2010 02:33 am UTC
January 21, 2010 02:33 am UTC
|
Joined: Jan 2000
Posts: 7,503
Trenton, On, Canada.
Ghislain Goudreau
Senior Member, with Far TOO Much Time on Their Hands
|
Senior Member, with Far TOO Much Time on Their Hands

Joined: Jan 2000
Posts: 7,503
Trenton, On, Canada.
|
Wow is all I got to say!!! (insert drool here)
Ghislain
Rouge!!!
|
|
|
Re: AE86 build update
[Re: Thomas Wong]
#322272
January 21, 2010 05:24 am UTC
January 21, 2010 05:24 am UTC
|
Joined: Nov 2007
Posts: 253
St. John's, NL
Mike Hiscott
OP
Serious Member
|
OP
Serious Member
Joined: Nov 2007
Posts: 253
St. John's, NL
|
So it's a little after 1:00 am and I just got in from turning wrenches. I got off work today at 4, and then had a 350 KM drive before I could commence  In the five or so hours I had at the car, I installed the Supra steering intermediate shaft and tercel u joint which let me hook my mr2 rack to my power ae86 column. Crazy combo lol. ![[Linked Image]](http://i45.tinypic.com/9a3eau.jpg) ![[Linked Image]](http://i45.tinypic.com/r9qvza.jpg) I centered up the rack, and aligned the car by eye until I get it on the alignment rack. I swapped in the Sparco wheel with detachable hub from my other AE86. I swapped the whole column actually lol. ![[Linked Image]](http://i50.tinypic.com/28h1ix3.jpg) I gained a nice bit of steering angle doing this steering rack swap while keeping the steering knuckles from my old power rack. ![[Linked Image]](http://i49.tinypic.com/2zebamw.jpg) Suspension check! Just need the brakes now ![[Linked Image]](http://i48.tinypic.com/11jons9.jpg) After setting the rack dead center though, with 1.5 turns to lock each way, it appears the position of the outer tie rod is actually farther out on the drivers side.... Is this normal? I suppose no matter how these are adjusted, the overall travel of the tie rod end would be the same wouldn't it? (notice the difference in the amount of exposed thread on the inner tie rods) Pass side: ![[Linked Image]](http://i49.tinypic.com/2rvzc02.jpg) Drivers side: ![[Linked Image]](http://i48.tinypic.com/1tsdpu.jpg) I got some new goodies! I'm redoing a bunch of the fuel lines with -6 an and Aeroquip fittings. ![[Linked Image]](http://i48.tinypic.com/4rtj74.jpg) ![[Linked Image]](http://i47.tinypic.com/auz9ex.jpg) I was going to use this SS manifold, but.... ![[Linked Image]](http://i47.tinypic.com/qpp109.jpg) I'm thinking I'll use my heat-wrapped log mani for a while longer. I pulled off the turbo and swapped the log manifold back in. [img] http://i47.tinypic.com/2l8ddg9.jpg[/img] Tomorrow I'll try to finish up prepping the motor to be installed in the bay. I have to remove the FWD waterpump and swap in the RWD pump with the associated lines and such. I also have to swap accessory brackets and get my VR crank sensor setup up on a bracket...
|
|
|
Re: AE86 build update
[Re: Mike Hiscott]
#322285
January 21, 2010 04:48 pm UTC
January 21, 2010 04:48 pm UTC
|
Joined: Jun 2009
Posts: 72
Toronto, Ont
samuel munoz
Regular Member
|
Regular Member
Joined: Jun 2009
Posts: 72
Toronto, Ont
|
Wow im jealous i wish i could build my car from the ground up like that. Could i have it when its done  , good job man cant wait till its done.
Last edited by samuel munoz; January 21, 2010 04:49 pm UTC.
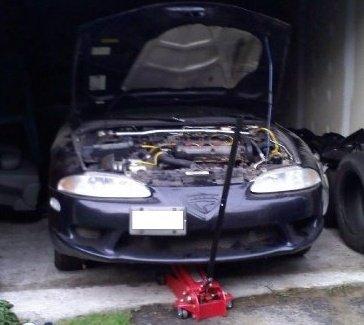
-1995 Eclipse rs
-http://www.cardomain.com/ride/2301547
|
|
|
Re: AE86 build update
[Re: Mike Hiscott]
#322317
January 22, 2010 03:22 am UTC
January 22, 2010 03:22 am UTC
|
Joined: Nov 2007
Posts: 253
St. John's, NL
Mike Hiscott
OP
Serious Member
|
OP
Serious Member
Joined: Nov 2007
Posts: 253
St. John's, NL
|
Well today was slow going as I was trying to get winter tires installed on my daily driver, and I was trying to get a pile of other car related stuff done. First thing in the morning I went to Mitsubishi to pick up my winter tires (Blizzak LM60 245/40R18). Now today it snowing pretty bad, and my car had COMPLETELY bald summer tires on it... Because of this, I couldn't take the car somewhere to get the tires changed over. I had to bring the wheels... But all my jackstands were in use under the Corolla, so I had to do two rims/tires at a time. I ended up jacking up the back end of the car, and taking two wheels to a rim shop up the street. ![[Linked Image]](http://i47.tinypic.com/2eweb8n.jpg) ![[Linked Image]](http://i48.tinypic.com/2w7mqf7.jpg) After dropping off the rear wheels to the rim shop, I hit up fasteners plus, canadian tire, a sheet metal shop, automotive supplies, and napa. What a bunch of running around. This cut into progress time, but was essential as every errand was related to getting it done. One of this first things I did was remove the FWD water pump. ![[Linked Image]](http://i48.tinypic.com/2qc4ap3.jpg) I replaced it with the RWD variation with all the factory lines. I didn't snap a pic, but you can see the RWD lines in later pictures of the engine. Next I replaced the RC 550 injectors I had with a set of Denso 660s that I used to use in my Talon. I found the Densos great, and I'll be close to the limits of the 550s, so I might as well ![[Linked Image]](http://i47.tinypic.com/292y1yr.jpg) Lets see....then I bolted on the Fidanza flywheel and Spec clutch, and bolted on any accessory brackets/VR sensors and such to the engine ![[Linked Image]](http://i50.tinypic.com/2zpqcux.jpg) Time to toss her in! ![[Linked Image]](http://i46.tinypic.com/25ahfki.jpg) Bammm!!! ![[Linked Image]](http://i50.tinypic.com/11b21wk.jpg) Good day clutch! ![[Linked Image]](http://i45.tinypic.com/15fn5w0.jpg) Starting to look like a car again... ![[Linked Image]](http://i45.tinypic.com/8xl994.jpg) Rad in ![[Linked Image]](http://i47.tinypic.com/vx1dva.jpg) I got mail today! Hydro e-brake and Wilwood proportioning valve. I mocked it up, I'll be welding up a base for it soon. [img] http://i46.tinypic.com/wsuvsm.jpg[/img] Anyways, I never did get all four tires changed over today. Two are done, but two rims are still at the shop. My poor car's held up by two jacks lol [img] http://i48.tinypic.com/2z82hch.jpg[/img] [img] http://i50.tinypic.com/29ehieb.jpg[/img]
|
|
|
Re: AE86 build update
[Re: Mike Hiscott]
#322937
January 31, 2010 04:59 am UTC
January 31, 2010 04:59 am UTC
|
Joined: Nov 2007
Posts: 253
St. John's, NL
Mike Hiscott
OP
Serious Member
|
OP
Serious Member
Joined: Nov 2007
Posts: 253
St. John's, NL
|
Put some work in on the car today! I had been having trouble lately with the sandblasting as the garage is humid and I guess the sand was clumping from the moisture... Anyhow, I finally picked up a massive dryer from princess auto which takes pellets that remove the moisture. I also hooked up my new regulator/particle separator to the system. The result was some great sandblasting I had these parts roughly cut out before, but today i bead blasted the areas with surface rust, and cut out the metal with holes. I've got almost all the rusty pieces out now thankfully. Sand everywhere! ![[Linked Image]](http://i49.tinypic.com/149piqc.jpg) I blasted where the plates for the cage were welded in. I guess after they welded the plates in, they didn't put any new paint on underneath. ![[Linked Image]](http://i45.tinypic.com/2cpvldz.jpg) In around here was pretty bad before. I blasted it all and cut out a section up top. I'm going to be cutting out another piece on the bottom of the seam where you can see the hole: ![[Linked Image]](http://i50.tinypic.com/j9aljd.jpg) Oh snap I'm makin' new pieces from sheet metal! For the large patch I made for the bottom of the quarter panel, I used vice grips to bend a coat hanger to the profile of the rocker of the car, and brought the shape to a sheet metal shop. They made up the patch panel piece and I cut it to size. ![[Linked Image]](http://i46.tinypic.com/259wexl.jpg) ![[Linked Image]](http://i47.tinypic.com/10xemat.jpg) They fit pretty well! ![[Linked Image]](http://i50.tinypic.com/30vdquh.jpg) ![[Linked Image]](http://i47.tinypic.com/2h4xl6o.jpg) Gotta make ones for the other side now, and do some more sandblasting before I can weld these puppies in!
|
|
|
Re: AE86 build update
[Re: Mike Hiscott]
#322943
January 31, 2010 03:23 pm UTC
January 31, 2010 03:23 pm UTC
|
Joined: May 2003
Posts: 7,263
Niagara Falls, Ontario
Ziggy Dietrich
Senior Member, with Far TOO Much Time on Their Hands
|
Senior Member, with Far TOO Much Time on Their Hands
Joined: May 2003
Posts: 7,263
Niagara Falls, Ontario
|
Mike, please let me know how that dryer works out and how long those pellets last. I have been having TONS of problems with moisture in my blasting cabinet. I have tried smaller dryers without success, and cant seem to justify huge bucks for a refrigerant dryer. I tried a smaller dessicant drier, and it filled in minutes...would love to hear how this one works..
"bluebird" worlds fastest scooter ridden by me
"Whitebird" RIP
|
|
|
Re: AE86 build update
[Re: Ziggy Dietrich]
#322947
January 31, 2010 04:57 pm UTC
January 31, 2010 04:57 pm UTC
|
Joined: Feb 2003
Posts: 301
High Prairie, Alberta
Stacey Shaw
Serious Member
|
Serious Member
Joined: Feb 2003
Posts: 301
High Prairie, Alberta
|
Ziggy, I have moisture problems also, my air compressor has a small tank and runs lots to keep up. The princess auto stuff worked but the pressure drop was nasty or if the pressure drop was ok, the filter or trap would fill too quickly. Canadian tire stuff was no better. I have switched to DeVilbiss disposable filters. Minimal pressure drop and they last when painting/sandblasting. DeVilbiss also makes larger filters for more commercial applications. Although I don't know where you would source them in Ontario as I get them at KMS Tools which is only located in B.C. and AB. Here is a link KMS Tools - filters Just some more options for you to consider.
A mind is like a parachute, it only works when open!
92 AWD 2.3 Auto 20G
|
|
|
Re: AE86 build update
[Re: Rob Gripper]
#324555
February 18, 2010 10:52 pm UTC
February 18, 2010 10:52 pm UTC
|
Joined: Nov 2007
Posts: 253
St. John's, NL
Mike Hiscott
OP
Serious Member
|
OP
Serious Member
Joined: Nov 2007
Posts: 253
St. John's, NL
|
New parts! Big ol box! ![[Linked Image]](http://i48.tinypic.com/2coh09c.jpg) It's actually two boxes, here's one opened! ![[Linked Image]](http://i47.tinypic.com/990t3a.jpg) Oh nice! A new hood! ![[Linked Image]](http://i50.tinypic.com/4twpqv.jpg) Another box, what's that? ![[Linked Image]](http://i47.tinypic.com/34o8v4l.jpg) Bam!! A hatch! ![[Linked Image]](http://i48.tinypic.com/116htaa.jpg) Money shot... ![[Linked Image]](http://i48.tinypic.com/2qsrq78.jpg)
|
|
|
Re: AE86 build update
[Re: Mike Hiscott]
#324651
February 20, 2010 02:18 am UTC
February 20, 2010 02:18 am UTC
|
Joined: Nov 2007
Posts: 253
St. John's, NL
Mike Hiscott
OP
Serious Member
|
OP
Serious Member
Joined: Nov 2007
Posts: 253
St. John's, NL
|
So I bolted the hood on the car, tried to close it, and it encountered resistance about half way closed. Turns out Seibon didn't cut out the holes behind the two hinge mounts like the factory setup. These holes allow two hooks above the firewall to fit up into the hood as it closes. Here's a shot of the hood with the missing hole. ![[Linked Image]](http://i50.tinypic.com/fy076h.jpg) Then I drilled some holes (I could see the indentation of where the recess was supposed to be). ![[Linked Image]](http://i49.tinypic.com/103xtv6.jpg) Then I did the other side. ![[Linked Image]](http://i50.tinypic.com/xfb80x.jpg) I did up to this point indoors, but next needed air tools, so I headed to the garage. I used the die grinder with a grinder bit to smooth everything out. ![[Linked Image]](http://i49.tinypic.com/2ze08ic.jpg) ![[Linked Image]](http://i48.tinypic.com/algivm.jpg) This needs to fire soon! ![[Linked Image]](http://i47.tinypic.com/28gwpkm.jpg) Schpladow! ![[Linked Image]](http://i49.tinypic.com/viefl4.jpg) ![[Linked Image]](http://i48.tinypic.com/16ifrk1.jpg) Next I need to get the window out of this one! I have a lexan window that has a hole for the fuel filler, but I don't really want to run it on the street... I think I'll lower the filler neck slightly, and run regular glass. I'll just have to pop the hatch at the gas station....no biggie. ![[Linked Image]](http://i50.tinypic.com/175nwx.jpg)
|
|
|
Re: AE86 build update
[Re: Mike Hiscott]
#324719
February 21, 2010 06:54 am UTC
February 21, 2010 06:54 am UTC
|
Joined: Nov 2007
Posts: 253
St. John's, NL
Mike Hiscott
OP
Serious Member
|
OP
Serious Member
Joined: Nov 2007
Posts: 253
St. John's, NL
|
Wrenched a bit more today! Hatch glass is in! I also cut down the fuel cell filler neck about 1 inch so I could have the filler below the oem glass window. It was set up for a lexan window with a hole for the fuel filler originally, but that wouldn't work well on the street with rain and such... ![[Linked Image]](http://i47.tinypic.com/e9dtfs.jpg) ![[Linked Image]](http://i45.tinypic.com/nntpgp.jpg) Side view... Ill be replacing these lexan windows with either glass or new lexan without the vents... Again, rain + holes = nono... ![[Linked Image]](http://i50.tinypic.com/slu0w2.jpg) Next I started to work on my panel gaps in the front end. I screwed in the standoffs for the hood, and adjusted them so the hood was flush with the fenders. Next, I realized the D/S fender needed a little tweaking so I pulled if off the car. ![[Linked Image]](http://i47.tinypic.com/ng9jiv.jpg) ![[Linked Image]](http://i48.tinypic.com/2exttvb.jpg) After I put the fender back on, and adjusted the gaps with the power headlight covers, the gaps looked pretty mint! ![[Linked Image]](http://i45.tinypic.com/2ppj15i.jpg) ![[Linked Image]](http://i47.tinypic.com/2hwgsd2.jpg) And finally, a bit more sandblasting and metal work on the rear. Hopefully all this will be done in another weekend or so. ![[Linked Image]](http://i50.tinypic.com/rh4cv9.jpg)
|
|
|
Re: AE86 build update
[Re: Mike Hiscott]
#326574
March 20, 2010 06:33 pm UTC
March 20, 2010 06:33 pm UTC
|
Joined: Aug 2009
Posts: 80
GTA
Errol 'Junior' Powell
Regular Member
|
Regular Member
Joined: Aug 2009
Posts: 80
GTA
|
This build is awesome! I only can dream of a AE86 build like that!
Keep up the amazing workmen ship!
R.I.P. Misty Jeanveau
1985 - 2009
Will love you always!
Your future Real Estate Agent!
|
|
|
Re: AE86 build update
[Re: Errol 'Junior' Powell]
#326585
March 20, 2010 09:12 pm UTC
March 20, 2010 09:12 pm UTC
|
Joined: Nov 2007
Posts: 253
St. John's, NL
Mike Hiscott
OP
Serious Member
|
OP
Serious Member
Joined: Nov 2007
Posts: 253
St. John's, NL
|
So the brake components are all painted with 3 coats of VHT caliper paint. They came out pretty nice, and will sit inside the house for 7 days to cure before I have the rotors turned so I can install them. ![[Linked Image]](http://i39.tinypic.com/98aezn.jpg) ![[Linked Image]](http://i41.tinypic.com/2dk0hms.jpg) I also cleaned and assembled the rear axle. The backing plates are still curing, so one they're all dry I'll be able to torque in the axle retainers. It has Ford 31 spline axles, 3.73 ratio R+P and an Auburn Pro LSD. Interested to see how it locks up! I also sorted out all the rear suspension bits. The five link is all ready to go, but I still need to modify one of the technotoytuning traction brackets (for the larger diameter axle) ![[Linked Image]](http://i41.tinypic.com/2aaeu53.jpg) ![[Linked Image]](http://i40.tinypic.com/3581jr4.jpg) Lastly, I removed the rear lexan windows. This will make painting the interior of the car easier, but the main reason they're out is to swap in some real glass windows. Given I'll be daily driving this car in the summer, I don't really want to have rain coming into the car through the vents that were on the lexan windows. ![[Linked Image]](http://i39.tinypic.com/2h6afyh.jpg) The next thing that will be on my plate tomorrow will be to finish sand blasting the area where I cut out some rusty metal. Most of the cutting is already done, and new metal will be welded in soon after I shoot the areas with weld through primer. ![[Linked Image]](http://i39.tinypic.com/ok0313.jpg) Im suprised the rust was so far along as the entire car is solid with the exception of the drivers side spring perch area, and the bottom of the rear quarters in front of the wheel wells. This has all been media blasted and all the cancer cut out.
|
|
|
Re: AE86 build update
[Re: Mike Hiscott]
#327509
April 02, 2010 04:24 am UTC
April 02, 2010 04:24 am UTC
|
Joined: Nov 2007
Posts: 253
St. John's, NL
Mike Hiscott
OP
Serious Member
|
OP
Serious Member
Joined: Nov 2007
Posts: 253
St. John's, NL
|
So I wanted to get my brakes installed today, and the pinion angle at ride height figured out so I could fab up my transmission mount. Below is how far I got with it... I cleaned up some rough welds in the hatch (mostly removing slag) and prepped all the areas I sandblasted with chassis saver. I'll be using weld through zinc primer for the patch panels I'm fabbing up. ![[Linked Image]](http://i39.tinypic.com/15d5kk7.jpg) I'll be masking the front half of the interior, and painting the rear half from the B pillar back. Just waiting on the hvlp gun I want to come in stock for this... I managed to wrestle the rear axle into the car by myself. It weighs a bloody ton compared to the stock toyota one ![[Linked Image]](http://i39.tinypic.com/23rk11l.jpg) Rear brakes... ![[Linked Image]](http://i40.tinypic.com/14b0xuw.jpg) Here it is sitting on its own weight. A first for me with this car lol. I can now get the ride height set and set my pinion angle. ![[Linked Image]](http://i44.tinypic.com/e9dp9w.jpg) Traction brackets bring the lower links nice and parallel with the ground ![[Linked Image]](http://i44.tinypic.com/2gsleh0.jpg) Nice! ![[Linked Image]](http://i41.tinypic.com/1zxw5et.jpg) Soon to be secure transmission... ![[Linked Image]](http://i44.tinypic.com/2vkka5s.jpg) Shifter position... ![[Linked Image]](http://i41.tinypic.com/rvx9ht.jpg) I got the front rotors on, and the caliper mounting brackets, but I need to pick up some hardware for the caliper itself tomorrow morning... ![[Linked Image]](http://i44.tinypic.com/20iaqtd.jpg) ![[Linked Image]](http://i39.tinypic.com/15yumj5.jpg) Shot of the engine bay [img] http://i44.tinypic.com/67p8jl.jpg[/img]
|
|
|
Re: AE86 build update
[Re: Michael Lee]
#327747
April 05, 2010 10:17 pm UTC
April 05, 2010 10:17 pm UTC
|
Joined: Nov 2007
Posts: 253
St. John's, NL
Mike Hiscott
OP
Serious Member
|
OP
Serious Member
Joined: Nov 2007
Posts: 253
St. John's, NL
|
So I removed the diffuser that was on the car originally. I'll have some pics of that process after, but the SD card they're on is a bit messed up... Here's the JDM bumper before I cleaned it up: ![[Linked Image]](http://i44.tinypic.com/23rn9ty.jpg) OEM Toyota bumper brackets! ![[Linked Image]](http://i42.tinypic.com/1zh07le.jpg) Installed! I primed the rear section with weld through primer, and later on I'll get the rear panels smoothed out. Pics of that soon. ![[Linked Image]](http://i42.tinypic.com/jpbiw5.jpg) Measured the wheel spacers I need in the rear. 1 and 1/8th inches... ![[Linked Image]](http://i43.tinypic.com/20houba.jpg) Horrid fitment lol ![[Linked Image]](http://i41.tinypic.com/i5aetj.jpg) Moved onto the front brakes! Here's the BBK caliper mounting brackets ![[Linked Image]](http://i44.tinypic.com/2qvzj7q.jpg) Passenger side: ![[Linked Image]](http://i39.tinypic.com/nq24h2.jpg) Driver side: ![[Linked Image]](http://i42.tinypic.com/24ywowj.jpg) Rear hatch area... ![[Linked Image]](http://i43.tinypic.com/2is88k2.jpg) Took off the front bumper, in preparation for the JDM treuno bumper. I also cleaned up the engine bay a bit... ![[Linked Image]](http://i42.tinypic.com/1xyqzo.jpg)
|
|
|
Re: AE86 build update
[Re: Mike Hiscott]
#327831
April 07, 2010 01:59 am UTC
April 07, 2010 01:59 am UTC
|
Joined: Jun 2009
Posts: 72
Toronto, Ont
samuel munoz
Regular Member
|
Regular Member
Joined: Jun 2009
Posts: 72
Toronto, Ont
|
Damn this is a sick build i wont be happy till i can build my car up like that it wont be my rs ofcourse but damn mike you got skills now i know who to call when im building mine up i hate to steal but ima gona have to, sorry Mcdonalds but IM LOVING IT!!!.... lol.
-1995 Eclipse rs
-http://www.cardomain.com/ride/2301547
|
|
|
Re: AE86 build update
[Re: samuel munoz]
#328133
April 11, 2010 01:07 pm UTC
April 11, 2010 01:07 pm UTC
|
Joined: Nov 2007
Posts: 253
St. John's, NL
Mike Hiscott
OP
Serious Member
|
OP
Serious Member
Joined: Nov 2007
Posts: 253
St. John's, NL
|
As promised, here's some shots of the rear diffuser mount removal. But first, lets toss an AEM wideband into the daily driver! I had an extra wideband bung added to my Ultimate Racing downpipe, so installation of the sensor was a breeze. ![[Linked Image]](http://i39.tinypic.com/2n84sx.jpg) I followed the factory front o2 sensor wire to a grommet in the passenger floor well and routed my AEM cable through the same hole. ![[Linked Image]](http://i39.tinypic.com/2lllo54.jpg) ![[Linked Image]](http://i39.tinypic.com/2qiyedg.jpg) You'd never say it was even there ![[Linked Image]](http://i44.tinypic.com/2e2idte.jpg) For now the gauge is just sitting in my cup holder as my gauge pod is still in the mail. Pics of that when its installed... Now onto the Toyota destruction. Here's the extended rear section the way it was to fit up against the diffuser: ![[Linked Image]](http://i42.tinypic.com/2rmxpmq.jpg) ![[Linked Image]](http://i42.tinypic.com/2mw8duf.jpg) The diffuser mount came off fairly easily, but I tore the factory metal a bit getting off the weld points. I'll patch this from inside with some new metal and grind down the welds soon. I'm happy just to have the clean rear lines back with a real bumper... ![[Linked Image]](http://i41.tinypic.com/8y5nc4.jpg) ![[Linked Image]](http://i39.tinypic.com/2yxpsat.jpg) ![[Linked Image]](http://i39.tinypic.com/258076q.jpg) Lots of bondo being removed to bring the rear valance back to bare metal ![[Linked Image]](http://i43.tinypic.com/20tfnmt.jpg) [img] http://i39.tinypic.com/25at6yx.jpg[/img] Fuuuuuuuuuu!!!! [img] http://i41.tinypic.com/5vwuaq.jpg[/img]
|
|
|
Re: AE86 build update
[Re: Mike Hiscott]
#328134
April 11, 2010 01:30 pm UTC
April 11, 2010 01:30 pm UTC
|
Joined: Nov 2007
Posts: 253
St. John's, NL
Mike Hiscott
OP
Serious Member
|
OP
Serious Member
Joined: Nov 2007
Posts: 253
St. John's, NL
|
Yesterday I was back at the transmission mount situation... First I heightened the rear by about 1 inch to even it out with the front. I don't want the car sitting too low for slalom and such, or I won't have any suspension travel. Setting the rear height will allow me to ballpark the pinion angle so I can figure where I want the tail shaft of the transmission to sit. I should have some spacers for the rear soon to correct the fitment. ![[Linked Image]](http://i43.tinypic.com/15rjm1y.jpg) This is the rear mount I was working on, using 6 inch flat bar. Upon further thought, I'm going to do this over with 4 inch stuff. I was initially measuring the cross section of the transmission tunnel from the four stock mounting holes. I've since moved this around a bit, making the new mount more narrow. ![[Linked Image]](http://i39.tinypic.com/2q3zreb.jpg) So I got started with a template, and after a few tries I got the bolt pattern from under the car onto paper ![[Linked Image]](http://i39.tinypic.com/5nn4hj.jpg) Then it was time for some circles! ![[Linked Image]](http://i41.tinypic.com/2s7yzyt.jpg) I traced the center diameter of the trans mount onto another piece of paper, and overlayed it to scribe out where the 4 bolt locations are. ![[Linked Image]](http://i44.tinypic.com/10mq806.jpg) ![[Linked Image]](http://i39.tinypic.com/6icuqe.jpg) Then I lined up everything to be parallel with the front of my other mount template, and transfered over the measurements. ![[Linked Image]](http://i42.tinypic.com/2e4gb9w.jpg) BAM!! A template: ![[Linked Image]](http://i43.tinypic.com/5ao0gg.jpg)
|
|
|
Re: AE86 build update
[Re: Mike Hiscott]
#328135
April 11, 2010 01:41 pm UTC
April 11, 2010 01:41 pm UTC
|
Joined: Nov 2007
Posts: 253
St. John's, NL
Mike Hiscott
OP
Serious Member
|
OP
Serious Member
Joined: Nov 2007
Posts: 253
St. John's, NL
|
The metal bar place was closed over the weekend, so I'll get back to the trans mount at a later date. The next thing on the list was to prime the inner areas behind the front doors (inside the rear quarter panels). I had sandblasted these areas, and now I'll be hitting them with some weld through primer and working on the new metal pieces to fit in. Here's what I've come up with for the driver's side: ![[Linked Image]](http://i39.tinypic.com/dxifky.jpg) ![[Linked Image]](http://i43.tinypic.com/156vno5.jpg) This is the stuff I'll be using for the areas to be welded. Zinc coating weld thru primer. ![[Linked Image]](http://i39.tinypic.com/16gfshz.jpg) Starting to mask the area to be sprayed... ![[Linked Image]](http://i39.tinypic.com/n3ndyg.jpg) Drivers side painted: ![[Linked Image]](http://i44.tinypic.com/2gy21y0.jpg) And the passenger side: ![[Linked Image]](http://i42.tinypic.com/suzrs3.jpg) Patch panel and some other random pieces sprayed: ![[Linked Image]](http://i41.tinypic.com/1znu1js.jpg) And finally, I got my tool for measuring the pinion angle ![[Linked Image]](http://i40.tinypic.com/5mgthw.jpg) More updates soon...
|
|
|
Re: AE86 build update
[Re: Peter Urach]
#328533
April 17, 2010 05:03 am UTC
April 17, 2010 05:03 am UTC
|
Joined: Nov 2007
Posts: 253
St. John's, NL
Mike Hiscott
OP
Serious Member
|
OP
Serious Member
Joined: Nov 2007
Posts: 253
St. John's, NL
|
So I took Friday off to get some extra work in today. Things went pretty well! I started off with the transmission x-member. I picked up some 4 inch 1/8" bar stock and chopped it up (using my paper template from a couple of posts back). This was my first time doing any real welding so I'm happy with the turn out. ![[Linked Image]](http://i44.tinypic.com/20k8w9l.jpg) ![[Linked Image]](http://i40.tinypic.com/14lq0b5.jpg) Bam! ![[Linked Image]](http://i40.tinypic.com/2r5z1ue.jpg) I had to trim the shifter hole forward about an inch. I dropped the transmission to do this, and grabbed the saber-saw. The position is pretty well centered now. ![[Linked Image]](http://i39.tinypic.com/152oznn.jpg) After ensuring everything fit well with my new x-member, I took it back out and wire wheeled the welds in preparation for etch primer. ![[Linked Image]](http://i39.tinypic.com/jiccav.jpg) Primed ![[Linked Image]](http://i43.tinypic.com/110fz8y.jpg) Painted.. This will be ready to bolt back on tomorrow morning. ![[Linked Image]](http://i40.tinypic.com/5ntzwx.jpg) Next I poked around at the intake manifold a bit. Its a smallport manifold, being converted for RWD. I chopped the ends off the manifold and fabricated new ones... ![[Linked Image]](http://i44.tinypic.com/246vxad.jpg) ![[Linked Image]](http://i43.tinypic.com/20z8sg3.jpg) ![[Linked Image]](http://i43.tinypic.com/1fuzgg.jpg) Lastly, I finally welded in one of the new rear quarter panel dogs legs. Welding the thin sheet metal was MUCH harder! [img] http://i39.tinypic.com/6ylesg.jpg[/img] Bottom spot welded in... [img] http://i39.tinypic.com/2mxnbfd.jpg[/img] All done! [img] http://i44.tinypic.com/14kbeq1.jpg[/img] After I finish up the other side, I will work on mounts for the rear bolt hole on the skirt end caps. You can see here how the end caps cover up the whole patched area. [img] http://i39.tinypic.com/2mga0bd.jpg[/img]
|
|
|
Re: AE86 build update
[Re: Mike Hiscott]
#328583
April 18, 2010 04:22 am UTC
April 18, 2010 04:22 am UTC
|
Joined: Nov 2007
Posts: 253
St. John's, NL
Mike Hiscott
OP
Serious Member
|
OP
Serious Member
Joined: Nov 2007
Posts: 253
St. John's, NL
|
So today I went to bolt my trans x-member in, and one of the four bolts stripped out. I ended up enlarging the forward mount holes with a larger M12 1.25 tap. Finally in... ![[Linked Image]](http://i41.tinypic.com/2qdpnid.jpg) Next I whipped up a mount for my hydro ebrake. It'll get welded on soon. I just need the short M8 hardware. The holes are tapped and ready. ![[Linked Image]](http://i40.tinypic.com/346uyl0.jpg) ![[Linked Image]](http://i43.tinypic.com/14e5gqx.jpg) Next I moved onto body work. Here's a little patch I whipped up. ![[Linked Image]](http://i41.tinypic.com/oksscn.jpg) Here's the passenger side rear quarter dogs leg I finally got around to fabricating... ![[Linked Image]](http://i41.tinypic.com/30j183c.jpg) Here it is welded in! Thanks to roaster for doing the welding for me tonight as I was taking care of cutting out other patches. ![[Linked Image]](http://i44.tinypic.com/2wn5t1d.jpg) Another random patch I'm working on... ![[Linked Image]](http://i42.tinypic.com/10zvd5j.jpg) Drivers side primed: ![[Linked Image]](http://i41.tinypic.com/2193t44.jpg) Passenger side... ![[Linked Image]](http://i39.tinypic.com/2rx8u95.jpg)
|
|
|
Re: AE86 build update
[Re: Mike Hiscott]
#329223
April 27, 2010 07:28 pm UTC
April 27, 2010 07:28 pm UTC
|
Joined: Nov 2007
Posts: 253
St. John's, NL
Mike Hiscott
OP
Serious Member
|
OP
Serious Member
Joined: Nov 2007
Posts: 253
St. John's, NL
|
Sup brahs? About damn time I post an update lol. As you may already know, during the week days I'm 350 km from my car, so I can only get in one or two hard days a week at it max. This week, I decided I'd try to get something done back in Gander where I work. It's a small town, so there's not much out here other than a Canadian Tire/Dominion/Wal Mart) I did, however, end up finding a welding shop. I brought them out my intake manifold, for which I had already fab'd block off plates, and told em what I needed done! Here's a shot of the chopped mani and the plates: ![[Linked Image]](http://i39.tinypic.com/5amlox.jpg) ![[Linked Image]](http://i42.tinypic.com/ip4is7.jpg) I'm converting a smallport 4age fwd intake manifold to fit my rwd setup. Pretty straight forward. The guy ended up doing a pretty nice job on the mani. It's a bit dirty right now, but I'm going to bead blast it again to make it fresh prior to the install. ![[Linked Image]](http://i42.tinypic.com/2j2t383.jpg) ![[Linked Image]](http://i40.tinypic.com/35mi59k.jpg) Used a large NPT tap for the GM open element air temp sensor. ![[Linked Image]](http://i41.tinypic.com/2l8yah0.jpg) I'll be making a bracket soon for the throttle cable on the back of the intake mani this weekend hopefully. I'd like to have my whole intake system (ic piping/ic/bov) done the weekend after next... Lets see how it goes. ![[Linked Image]](http://i39.tinypic.com/sxkkjp.jpg)
|
|
|
|
|


![[Linked Image]](http://www.princessauto.com/components/com_virtuemart/shop_image/product/8055757.jpg)
![[Linked Image]](http://www.princessauto.com/components/com_virtuemart/shop_image/product/8006307.jpg)

![[Linked Image]](http://i44.tinypic.com/2r7xa3c.jpg)
![[Linked Image]](http://i42.tinypic.com/7k1t.jpg)
![[Linked Image]](http://i42.tinypic.com/1zfqu10.jpg)
![[Linked Image]](http://i43.tinypic.com/2ry4plg.jpg)
![[Linked Image]](http://i40.tinypic.com/al526g.jpg)
![[Linked Image]](http://i40.tinypic.com/24yzr78.jpg)

![[Linked Image]](http://i43.tinypic.com/5fq5mt.jpg)
![[Linked Image]](http://i39.tinypic.com/15xv2gh.jpg)
![[Linked Image]](http://i42.tinypic.com/anfzvc.jpg)
![[Linked Image]](http://i43.tinypic.com/zlypvl.jpg)


![[Linked Image]](http://redders.files.wordpress.com/2009/08/president-bush-eats-kitten-1259.jpg)